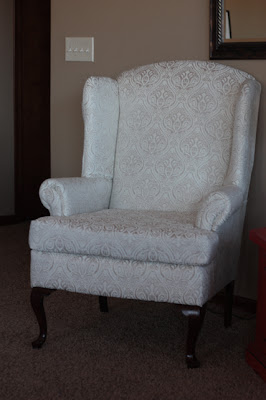
Not awful, but it could be so much better! I am not going to do a step by step tutorial for this. The Creative Maven has an excellent tutorial that we followed here. In short, a chair is put together like an onion, one layer on top of another. So the layers must be peeled off and labeled, one at a time. Once all layers are removed, and about 1000 staples later, it's time to cut pieces for the new fabric. We laid out 6 yards of our new fabric and placed the old pieces on it. We traced them and cut each piece out, making sure the fabric was going the correct direction. Then the pieces go back on, but in the opposite order. Like I said, it is much more complicated than this. Definitely check out The Creative Maven's tutorial if you're interested! It was mostly stapling back together, but it did require some sewing. I have never sewed in my life, so I was happy with my maiden voyage. The cushion had to be sewn as well as the wings and the piece the cushion sits on. So here is the after.
I had a hard time choosing the fabric. We have a red table that I redid next to the chair. And yes, only one chair has been done. We were a bit burned out from reupholstering but are going to start the other one soon. Because of the bright red table we were somewhat limited in fabric choices. Then I found this one on red tag sale at Hancock Fabrics and knew it was the one! They only had enough in store to do one chair, but luckily they had more online and the colors were identical!
And because I can't post without a picture of Carter, here he is sitting in the lovely chair!
It was definitely a labor of love, but I'm so happy to have it. I love it! And I'm linking this up with The CSI project since the theme for this week is reupholstering along with Thrifty Decor Chick and Miss Mustard Seed!
Thanks for stopping by!


Awesome job! I love making old furnishings look new and different, though I don't know if I could ever manage upholstery.
ReplyDeleteGreat great work!
That turned out great. I can't believe it was your first upholstery and sewing project! You should definitely do more!!
ReplyDeleteI've been on a thrifting hunt to find wing back chairs. No real success yet, but I'm not defeated.
ReplyDeleteYour chair turned out great. Kudos to you.
Wow! What a beautiful redo! Nice job on your first foire into reupholstering! I redid some dining room chairs (6) a couple years ago. My hands were never so tired from pulling and stapling!!
ReplyDeleteWhat a great transformation! Great work!
ReplyDelete